How to Create Forms
With forms you can take inquiries, applications and more with a few easy steps.
To create a form, click on “Forms” in the left purple menu to navigate to the Forms Manager.

Click on “New Form” and give it a title and description. The title and description are for your use within admin only and will not show up on the website.
Form Settings
- Confirmation Message and URL
- The Confirmation Message is what will display in a popup box once a user has submitted a form successfully. It’s a good idea to put a short, friendly message.
- The Confirmation URL is a way to redirect users to a specific page once they have successfully submitted a form. You can create a specific landing page thanking them for filling out the form, to a page with more information related to the form they filled out, or to your home page. The default action after submitting a form refreshes the page the form is on, and displays the Confirmation Message popup, if one is provided.
- If no confirmation URL or message is provided the form will submit but users will not receive any message indicating they submitted a form. It’s best to include a Confirmation Message.
- Allow Saving
- If your form will be particularly long (applications with multiple sections) you may want to allow saving. This option does require that a user have an account on your website and be logged in, but if they need to save their profess filling out a long form and come back to it at another time they can when this option is enabled for that form.
- Recipients
- Here you can include email addresses (including distribution lists) that should receive a notification of when a user has submitted a form. You want to always include a form recipient, otherwise you would have to login daily to see form subnmissions.
- You can also include response details in the emails that are sent on a submission. This will include the questions and answers from the form so that admins don’t have to login to retrieve a full form submission. This excludes form fields that have encrypted data, which is set by the admin when necessary.
- Payments
- You can enable payments for a form if needed. Nimble has integrated Stripe’s functionality to take payments through our websites. Please contact us for more information about setting up Stripe with your Nimble website to be able to take payments through forms and calendar events.
- Security
- To prevent bots from filling out forms on your site, it’s best practice to enable the RECAPTCHA option (“I am not a robot” checkbox) which is displayed at the end of a form and is required before submission.
Building Your Form
Once you have created your new form you will be redirected to its builder. To edit an existing form go to the Forms Manager and click on “Builder” on the right for any of your existing forms.
Once you’re in the builder for the form you want to edit, you’ll see that you have form field options on the left, and the form you’re building will appear on the right.
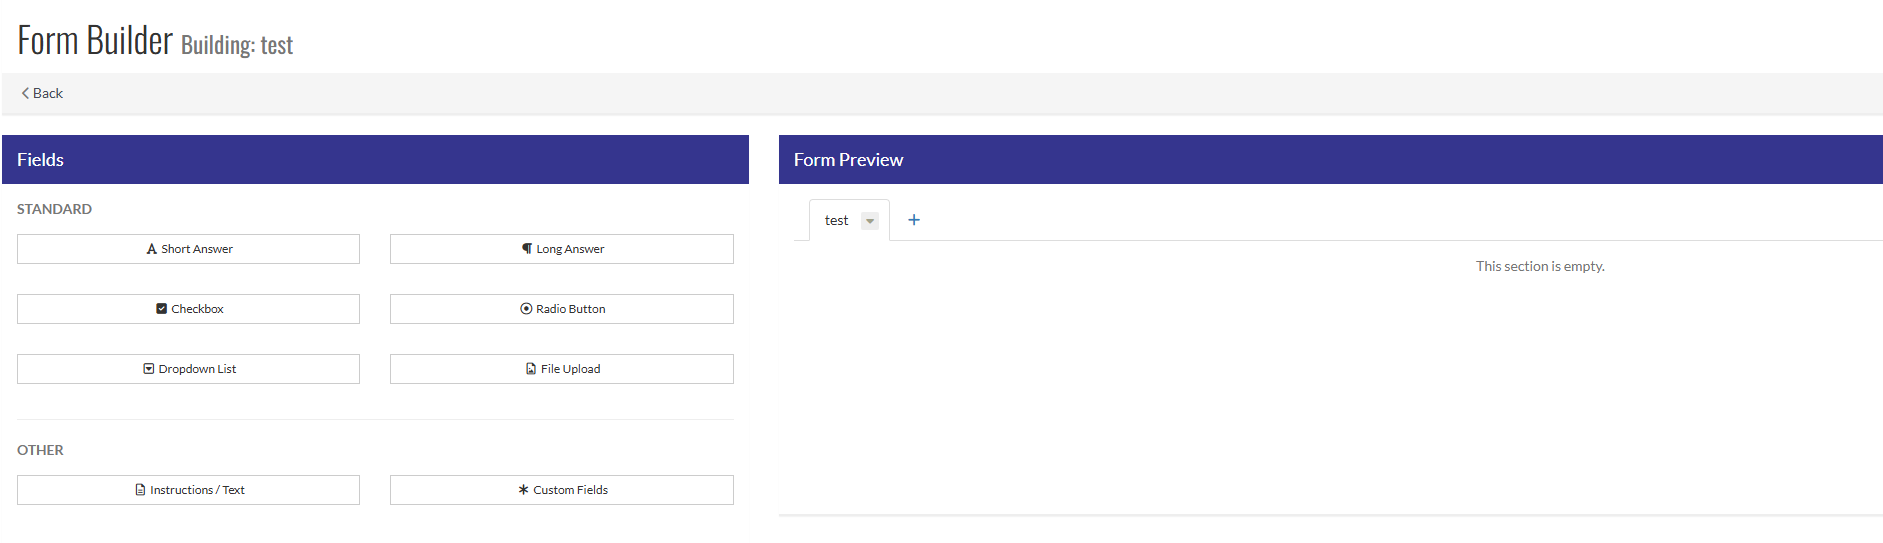
On the right you’ll notice a tab with the name of your form at the top. This title will only appear if you have more than one section to your form. You can rename these sections by clicking on the dropdown icon next to the title and selecting “Rename.”
If your form is very long and has different sections (eg: Contact Information, Education, Employment History etc). You can have one long form in one section, but having the questions grouped into different sections may make the form a bit more digestible to users.
To include some directions with your form as an introduction for users, click on the “Instructions/Text” option under “OTHER” and provide that intro. You can also do this with a content item widget if you wish, separate from the form itself.
To add fields to your form
- Select the field type on the left
- Give it a title
- If placeholder text is needed for the fields you can add that here
Placeholder text is the faint text that appears in a text box and disappears when text is entered by the user. - Select whether you want to require this field
- Select whether this field needs to be encrypted. This option should be used for sensitive data like Drivers License number, SSN, etc. If a form has any encrypted fields the form recipient(s) will need to log in to retrieve the submission. Encrypted field answers will never be sent via email for security purposes.
- The last option is field width. This determines how many of the 12 columns of the responsive grid your field will take up.
- To have two fields next to each other, make them each 6 wide.
- To have three fields next to each other int he same row, make them each 4 wide.
- etc.
- You can also include validation options if you want to require a specific type of answer (integer only, alpha-numeric, email address,etc.)
Add Your Form to a Page
Once all of the fields for your form have been added you can add that form to any page on your website. For example, if you’ve created a contact form:
- Create a Contact Us page if you don’t already have one.
- Click “Add Widget”
- Select “Forms”
- Select your recently created Contact form
- Resize the form widget if you like, add other relevant widgets on the Contact Us page if desired
- Publish your page
- Add it to a navigation so that users can easily get to it
- Test your form to ensure it’s submitting successfully to the recipients that you included in the form setup process