Subpages and Page Deletion
- Adding a Sub-Page
- Adding sub-pages can help to keep you organized in page manager.
- For example, you may have a “Services” page and offer many services which will all need their own page. By creating sub-pages for your services you can keep all pages nested within your parent “Services” page.
- (Remember that navigation is built independent of page organization. This will not affect how you organize your navigation.)
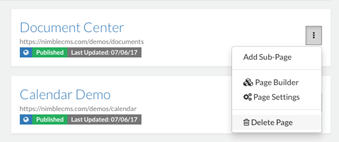
- To add a sub-page, go to Pages and find the page which will be the parent. Click on the menu button on the right and select “Add Sub-Page.” Here you follow the same steps in creating a page.

- Deleting a Page
- Unlike deleting widgets from a page, deleting a page will delete it permanently, but all of the widgets on the page being deleted will still exist in their Managers.
- Make sure that you are certain of the page you want to delete, go to Pages, locate the page to be deleted, click on the menu button on the right and then “Delete Page.”
- If there are sub-pages of this page you will need to delete all subpages before being able to delete that parent page. This is required to prevent accidental mass-deletion of pages.
- Unlike deleting widgets from a page, deleting a page will delete it permanently, but all of the widgets on the page being deleted will still exist in their Managers.
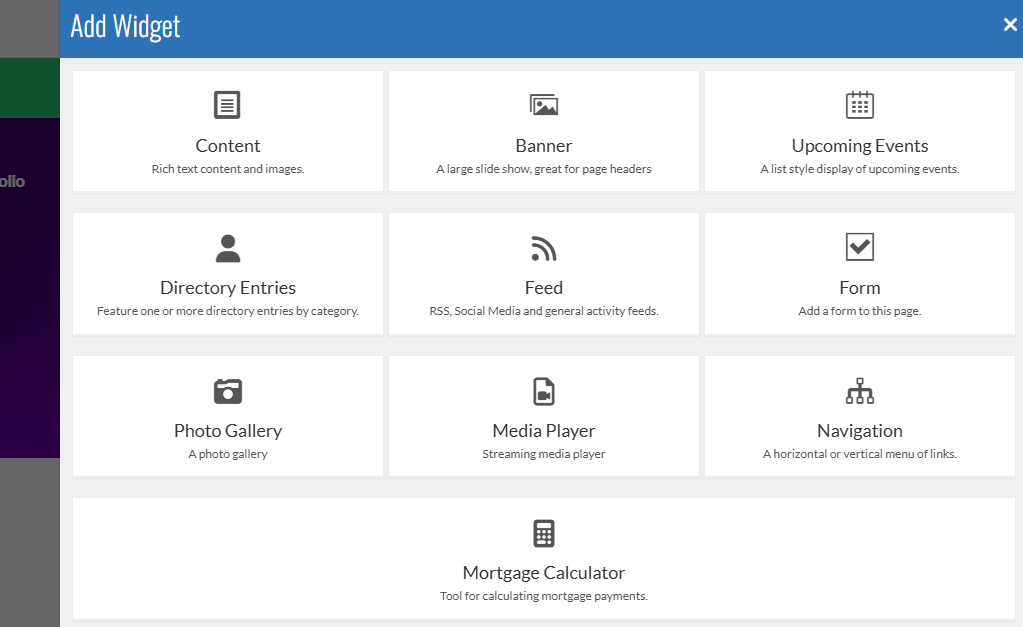
Adding Widgets
After creating a page, your web page will refresh to reveal your newly created page.
You will notice that the bar at the top of the page is red. This indicates that this page is currently unpublished and is unaccesible by users visiting your website, even if they know the direct URL.

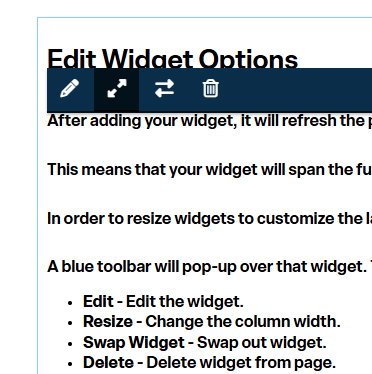
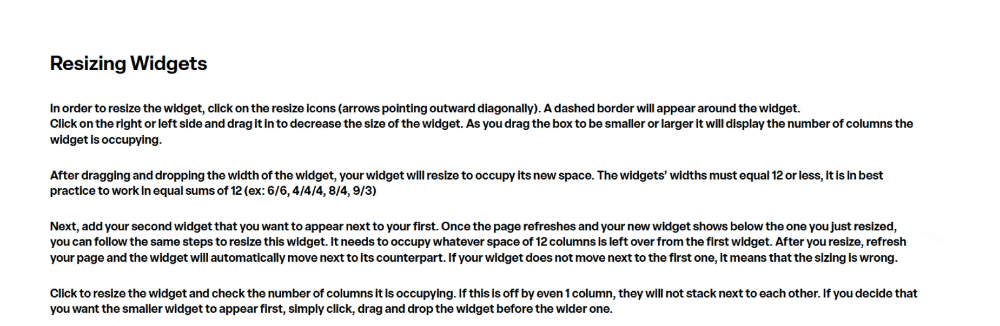
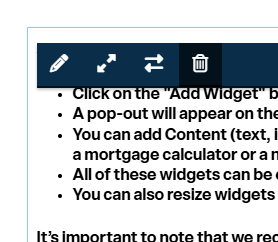
- Resizing Widgets
- In order to resize the widget, click on the resize icons (arrows pointing outward diagonally). A dashed border will appear around the widget.
- Click on the right or left side and drag it in to decrease the size of the widget. As you drag the box to be smaller or larger it will display the number of columns the widget is occupying.
- After dragging and dropping the width of the widget, your widget will resize to occupy its new space. The widgets’ widths must equal 12 or less, it is in best practice to work in equal sums of 12 (ex: 6/6, 4/4/4, 8/4, 9/3)
- Next, add your second widget that you want to appear next to your first. Once the page refreshes and your new widget shows below the one you just resized, you can follow the same steps to resize this widget. It needs to occupy whatever space of 12 columns is left over from the first widget. After you resize, refresh your page and the widget will automatically move next to its counterpart. If your widget does not move next to the first one, it means that the sizing is wrong.
- Click to resize the widget and check the number of columns it is occupying. If this is off by even 1 column, they will not stack next to each other. If you decide that you want the smaller widget to appear first, simply click, drag and drop the widget before the wider one.
- Deleting Widgets
- If after adding and resizing your new widget you want to swap it out, you can use the “Swap out” icon to exchange this widget within this size with any other widget listed.
- If you decide you want to remove this widget from the page, simply click to bring up the toolbar, and hit the delete icon (trash can). This will remove the widget from this page only, and it will still exist within its widget manager.
- Creating a Classifieds
- Creating Classifieds is the same steps as a Directory, Calendar or Blog. Simply select the tags which you’ve already created in order to determine which tags will show on this page. You must first create tags within that widget’s Manager.
- You can also add more tags to this Classifieds page in the future, simply go to Pages -> (Classifieds Page) -> click on the gear icon in the top right and select “Classifieds Settings” to update which tags are included on this page.

- Creating a Document Center Page
- A Document Center page allows you to make folders within your File Manager accessible through the user-side of your website.
- After you create a folder in your File Manager and populate it with files you want to share, you can create your Document Center Page.
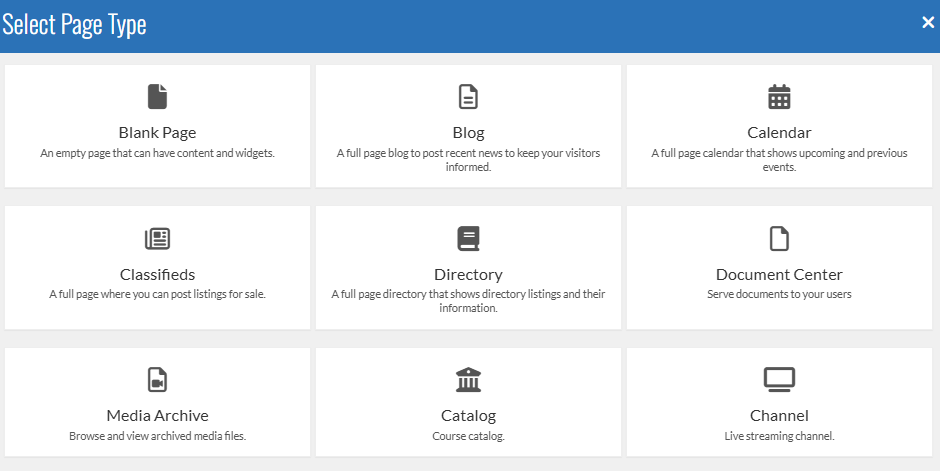
- Go to Pages -> Add New and select “Document Center.”
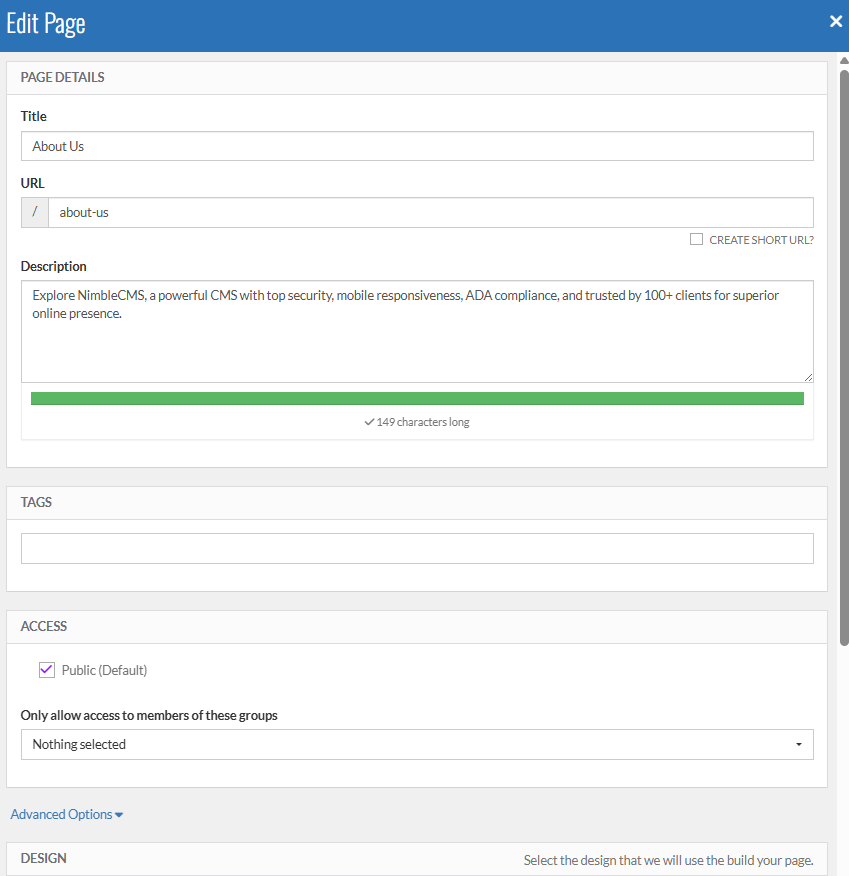
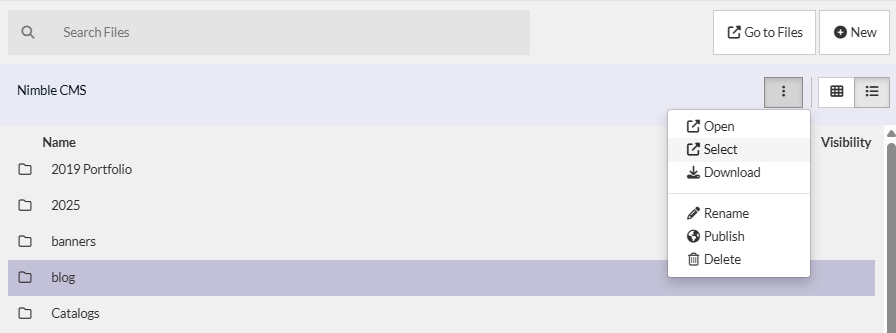
- In the next popout, it will ask you to choose a folder you want to share. Let’s say we want to create a Document Center for the folder titled “Documents” (pictured left), we would click on “Documents” and then click “Use this folder.”
- After that, it will prompt you to fill out the general page information and then click “Create Page” at the bottom of the pop-out.
- Creating a Calendar Page
- To create a full-page calendar, click “Add New” in Pages, then select “Calendar.”
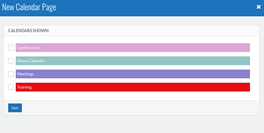
- You’ll then be shown a list of different Calendar/categories you’ve created to choose from. Whichever categories you select are the ones that will appear on this calendar page.
- You can edit these calendar settings in the future by going to Pages, clicking on the calendar page, then in the Calendar Page Builder/Editor, click on the gear icon in the top right and “Calendar Settings.”
- There you will be able to select or deselect Calendars categories that appear on that page.
- Creating a Blog
- A Blog is a great way to post news articles and updates to your website. A Blog allows users to search by keyword, category and date. The Blog page shows a thumbnail (if provided) and an excerpt of the blog article along with a Title.
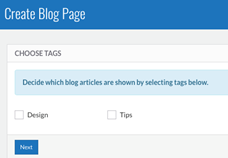
- To create a Blog page, you need to first create a blog entry and create tags for the blog. You can create one tag such as “blog” or “news,” or you can create multiple different tags and categorize your entries based on their content. Remember that in the future as new blog tags are created you will need to go back and update the settings of the blog page in order to include those entries on that blog page.
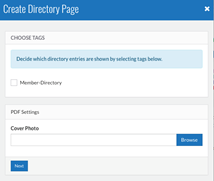
- Creating a Directory
- Creating a Directory is the same steps as a Calendar or Blog. Simply select the tags which you’ve already created in order to determine which tags will show on this page. You must first create tags within that widget’s Manager.
- You can also add more tags to this Directory page in the future, simply go to Pages à (Directory Page) à click on the gear icon in the top right and select “Directory Settings” to update which tags are included on this page.
- You can also set a Cover Photo which is what will appear as the first page when this Directory is downloaded as a PDF.
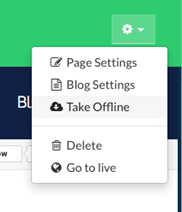
Take a Page Offline
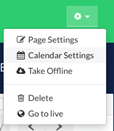
You may have a need to take a page offline temporarily, if so there’s no need to delete, simply go to Pages and click on the Page you want to take offline. In the top right click on the gear icon and select “Take Offline.”
This will un-publish the page so that it is not visible on the website. You will be able to view the page as long as you are logged in, but once you log out the page will no longer be visible on the website and you will see the website as a general user/visitor.
To publish the page, simply login, go to Pages and in the list you can find the page and click on the green publish button.
Additional Features
Desktop, Tablet, and Mobile Viewers
You may notice three icons at the top of your Page Builder: desktop, tablet and mobile icons.
Clicking these will display the page in desktop, tablet or mobile size so that you can preview what your page will look like on differently sized devices.
"Go To Live"
If in Page Builder and you want to view the page on which you’re working on the live version of the website, you can click on the gear icon and select “Go to live” which will open that page within a new tab.